Path of Exile 2: The Otherworld Chapter 3 Plot Walkthrough


lootbase
lootbase
Path of Exile 2 is a deep role-playing game that allows players to immerse themselves in a dark fantasy world. It requires wisdom and strategy to find a way out in a complex dungeon. In the last issue, we finished the second chapter of the plot. Now let's enter the third chapter of the plot Hope of the Vaal. Below is the route guide for each mission point, teaching you how to complete the mission and pass the plot more quickly. Let's learn!

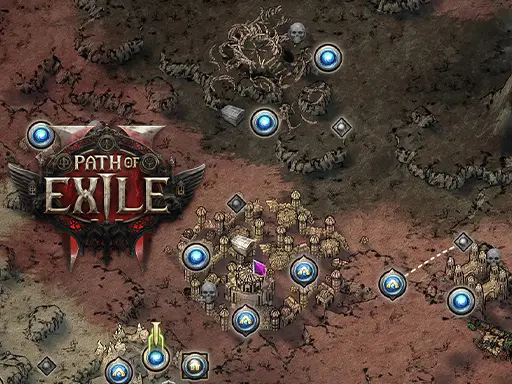
Wind and Sand Swamp
After talking to the man in black, enter the Wind and Sand Swamp. We just need to go to the end in the direction opposite the entrance, and then explore along the bottom to find the end and the camp. There are three events in the Wind and Sand Swamp. After completing the root silt tree monster, you will get a level 9 skill gem. There are 2 elite monsters that must be beaten at the Orlok campfire. The box will definitely drop a low-level craftsman stone, and the hanging tree can turn things over. After entering the Highland Tower Camp to interact, there is one thing that needs to be explained in particular. The camp teleport point needs to run to the right for a while to see it, and then enter the jungle ruins.
Jungle Ruins
Jungle Ruins has a lot of content in the map. You will encounter the mighty silver fist boss. You can activate the record point first, because this boss is very powerful and can be killed in seconds. If it dies, you can teleport to the record point to fight it. After defeating it, you can get 2 talent points. There are also 2 small events in this map. Kick the can in the turmoil camp to drop equipment. There is an NPC next to it to exchange equipment, and there may be suitable equipment to wear. Click to summon the NPC of the broken dead body, and it will drop one of the two unidentified rare belts. In this picture, we stick to the wall on the right, go around and walk to the upper left corner, and we will definitely meet the end on the way. Then light up the teleport point of the map. The teleport point is usually not at the edge of the map. There is an entrance to the Toxic Tomb next to it. There is a quest item in the Toxic Tomb. After getting it, return to the city to interact and choose one of the three options: +25% stun threshold or +30% element abnormal threshold or +25% mana recovery rate. After choosing, we look for and enter the Infected Wasteland.
Infected Wasteland
The teleport point of the Infected Wasteland map is at the edge of the map. You can open the map next to the edge and click on the NPC to trigger the quest. When you encounter it during the map opening process, you can first activate the teleport points of the Dragon Lizard Wetland and Azak Swamp. This map has two events. There is an elite monster in the Wormland that drops equipment. You can trade equipment with the NPC. If you have suitable equipment, you can also wear it yourself. Then we teleport to Azak Swamp, find and defeat the Swamp Witch, and get 30 maximum spirits and level 10 spirit gems. Then teleport to the Dragon Lizard Wetland. The boss is usually on the left. We need to run to the left map. If you encounter the Chaos Temple on the way, you can activate the teleport point first. There are two events in the Dragon Lizard Wetland. The Toxic Flower has elite monsters. The Cannibal Camp kicks the can to drop equipment. Because there is no NPC to exchange equipment, it is not very playable. After defeating the boss of the Deadly Lair in this map, the level 9 skill gem and the Chaos Temple ticket will be dropped. Continue to the right to find the Chaos Temple (this is also the content of the Sublimation Trial. We can push the plot first and do the Sublimation Trial later). The intersection of Jikani's Machinarium is on the left side of the boss area.
Jikani's Machinarium
After entering the Jikani's Machinarium map, talk to the NPC. After we find the small soul core nearby, go back and click on the stone array altar to open the door, and then find the Forgotten Chamber. The small soul core is also needed to open the door. Open the door and kill the Black Jaw boss to get 10% fire resistance. There are 3 rare boxes in the supply room. Use the small soul core to enter the Sanctuary of Jikani.
Sanctuary of Jikani
After arriving at the Sanctuary of Jikani map, activate the teleport point and interact with the lobby. Look for it not far from the lobby. You will most likely find a medium soul core. This map has an event called the Altar of Pollution, which pollutes and corrupts an equipment. After finding the medium soul core, activate two generators. The location of the generator is one in the upper left corner and one in the upper right corner. It may also appear in the upper right or lower right corner, but the activated task props appear randomly. You can use the record point to regenerate and refresh the distribution of the props, and then return to the lobby. The plot needs to wait for the "redstone circuit" on the ground to be connected before it can be triggered. After triggering, click on the large soul core on the ground to start the boss battle. After defeating the boss, a level 10 skill gem will drop. Pick up the task props. There is no need to return to the city. There is a teleport point next to it. Teleport back to the infected wasteland. At this time, the interface is underground. Click the button on the right to find the infected wasteland. There is a stone altar next to the infected wasteland. Click it to trigger the task and enter the Matlan Waterway.
Matlan Waterway
The Matlan Waterway map is to clear monsters all the way. Click the mechanism and walk along the position where the water recedes. Kill the elite monsters in the hut of the shaman that triggers the event in this map. Continue to click the mechanism until the last large mechanism is activated, and then go back to the city directly. After returning to the city, go down the stairs behind the man in black and enter the flooded city.
Flooded City
The Flooded City map is a transitional map. We will encounter a group of nests on the way, which are similar to crop circles. Many monsters will be triggered. In the process, you may encounter the lava treasure house teleportation point. After interacting with the NPC, go in and activate the teleportation point. You can go back and go there again. Clear the lava treasure house to open the recasting platform. It is also a task that you can only receive as the first character in this mode. After defeating the boss here, return to the city to talk to get the level 10 skill gem (if you can't beat it, you can fight it again after returning from the other world) and then go to the Dirt Peak.
Dirt Peak
In the Dirt Peak map, the event Boiler Guardian will be triggered, and the monsters will drop mushroom props of 3 colors. After hitting the mushrooms, click the big pot soup a few more times to get the magic level red bottle and blue bottle. Then go to the Fallen Pool, kill the Dirt Queen, pick up the props, and return to the city, and continue to go down the stairs to enter the Kopek Temple.
Temple of Kopek
Temple of Kopek has two floors in total. The map is in a triangle shape. The end of each floor is at the corner. On the second floor, continue to walk along the wall, but when you are halfway there, you need to pay attention to whether you encounter a crack blocking the road. If you don’t encounter it, just record the point of rebirth and go to the other end. If you encounter a crack, the end must be behind the crack. Use a leap to jump over. Killing monsters near there will drop the Heart of Sacrifice. After interaction, you will get 2 talent points. If the Heart of Sacrifice does not drop, record the point of rebirth, fight the monsters again, and then find the stairs all the way up to fight the boss. After defeating it, talk to the city and enter the point of the cliff. Then the plot goes back to the past, and continue to go down the stairs to enter Ozar. This is the flooded city 400 years later.
Ozar
Ozar The map is very large. Killing monsters on the road will drop the Heart of Sacrifice. Pick it up for use. On the way, we will encounter the venomous snake, which is a difficult boss in the plot. After defeating it, we will come to the other side of Ozal. There will be four events here, three of which correspond to three houses (Eskaba's house, Ulmoti's house, and Napuaz's house). In these three houses, you can pick up props to sell to NPCs and get 500, 1000, and 1500 gold coins respectively. The last event is the challenge of the trial master, which will drop the ticket of the Chaos Trial and continue to find the entrance to Agora.
Agora
Coming to the Agora map, we can see that this is a fixed map. This map also has three props that can be sold to NPCs, which can get 500, 1000, and 1500 gold coins. If you don't get the Sacrifice Heart in Ozal, you can continue to fight monsters in this map and get the Sacrifice Heart. After obtaining it, go to the Sacrifice Podium and use the Sacrifice Heart and Sacrifice Dagger to get 2 talent points. Then we come to the pitch-black secret room.
The Pitch-black Secret Room
The Pitch-black Secret Room map is the boss map for the final level of this chapter. The boss's first-stage damage attributes are fire and electricity, and the second-stage damage attributes are fire, electricity, ice, and elbow strikes. You only need to stack fire resistance and lightning resistance. The boss room is at the innermost part, so run to the upper left. After defeating the boss, click on the dialogue, return to the city and enter the rugged point. The screen lights up and then comes to the river bank. It goes black in front of your eyes and comes to the cruel difficulty plot. Then the plot process is the same, just replay it.
So far, the plot of Chapter 3 has ended!
If you’re looking to get Path of Exile 2 currency at the best prices possible you should definitely check out LootBase so, you don’t miss out of the exciting new content that’s coming to the game.
Before entering the third chapter of the story Hope of the Vaal, don't forget that PoE 2 currency plays a huge role in optimizing your equipment. If you need to upgrade your equipment level, don't forget that PoE 2 currency plays a huge role in optimizing your equipment. You can buy the best PoE2 currency at lootbase.gg to help you quickly upgrade your character level and take your PoE 2 adventure to the next level!

PoE 2 Currency
Exalted Orb*2000
$1.67
Path of Exile 2: New Season Alien Map Features
2025-06-11

Path of Exile 2: The Abomination of Jarmanla Boss Battle Strategy
2025-05-30
How to Increase Profits by Making Maps in Path of Exile 2
2025-05-28
An Overview of the Passive Skill Tree Mechanism in Path of Exile 2, Understanding How to Add Points Effortlessly
2025-05-26
Path of Exile 2 Atlas Mapping Tips & Tricks – Packed with Practical Insights!
2025-05-23
Path of Exile 2: The Waystones of Change
2025-05-21
Introduction to the Jewelry System in Path of Exile 2
2025-05-16
Path of Exile 2 Skill Introduction, New Players Come in
2025-05-14
Path of Exile 2: Trading Teaching Method, You Deserve it!
2025-05-08
Path of Exile 2: The Otherworld Chapter 2 Plot Walkthrough
2025-05-07